
The Right Way to Send Emails with Feathers.js
Table of content
- Setup
- The model
- The Hooks
Every modern application is in need of being able to send emails to their users. You could use a ready solution, but soon you will realise that it limits you and doesn’t integrate well with your flow. At Teacode.io, we have spent years perfecting the process of sending emails to be flexible, stable and versatile. Now we are ready to share our derived flow with you.
Setup
For the majority of our projects, we use Feathers.js as it allows us to deliver our clients’ products faster and better. Our database of choice for this example is MongoDB with Mongoose as the interface. First, we begin with generating a new service using the following command and answering the questions.
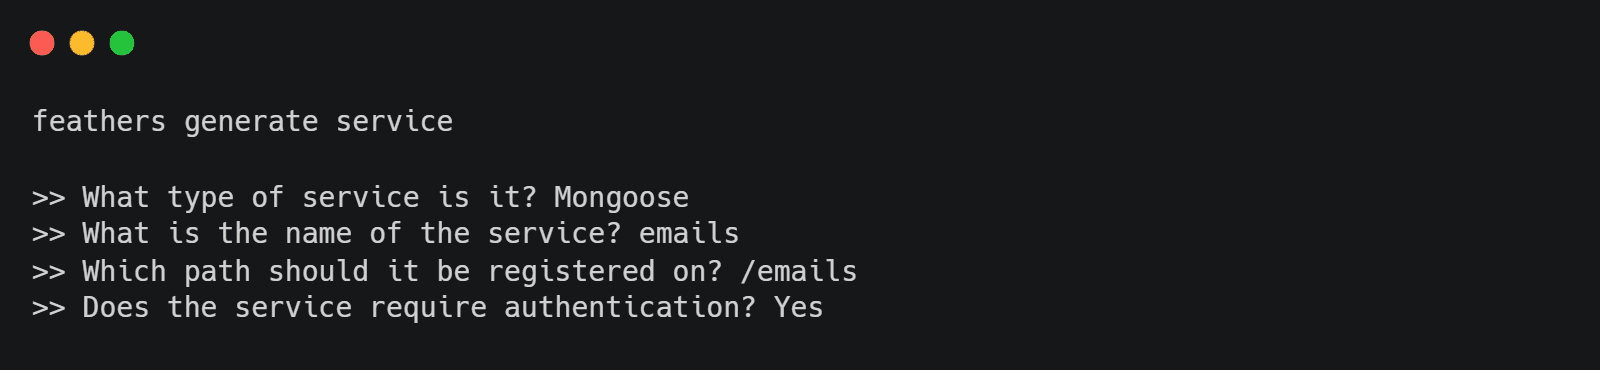
This will generate the necessary file structure.
The model
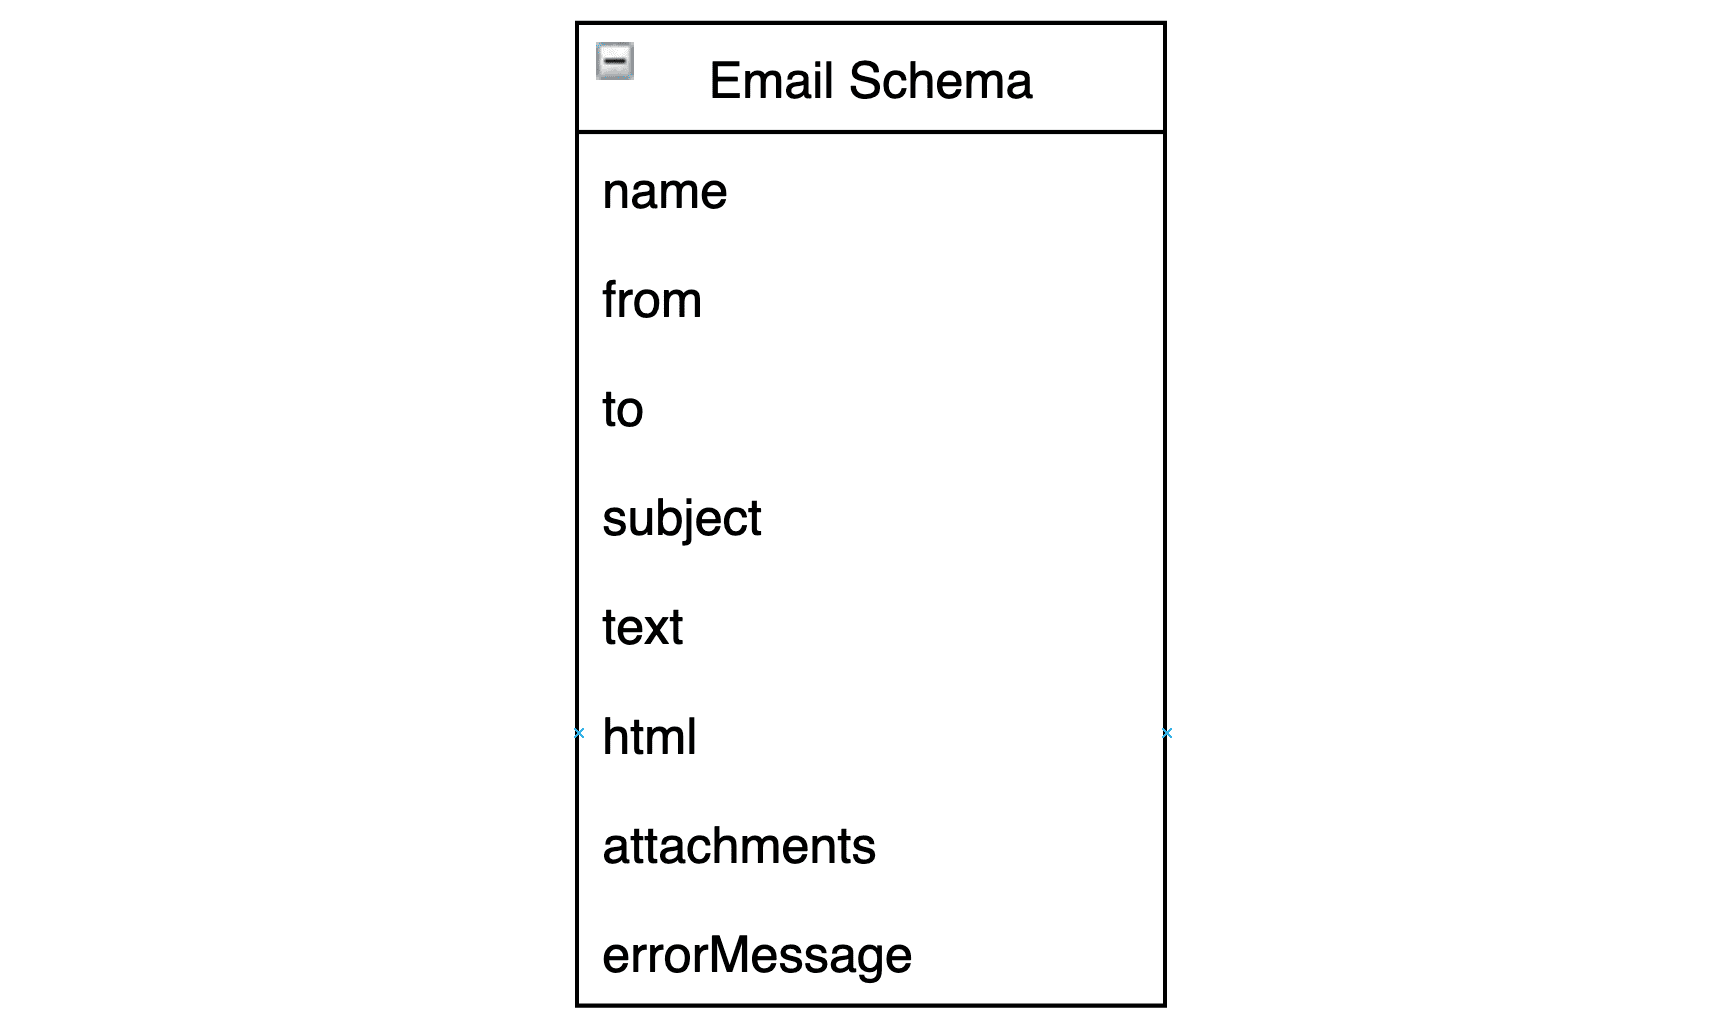
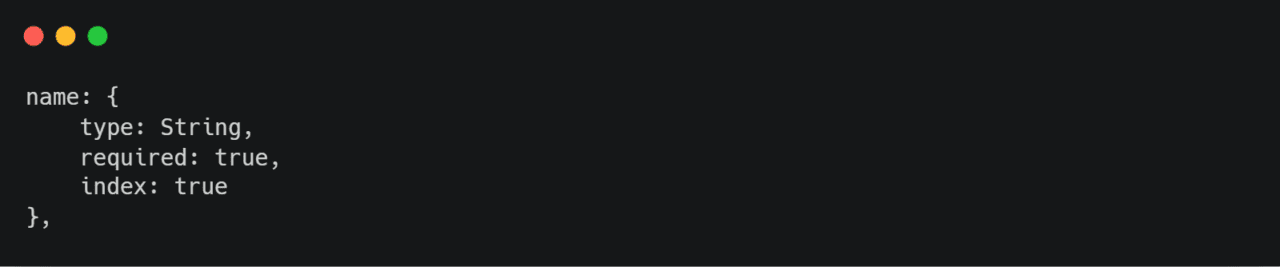
Before we dig deeper, let’s discuss the schema. First, we want to have a name for the email, which can store some unstructured information like Newsletter #142. This can be some information which you don’t want the recipient to see, but it will be useful for internal purposes.
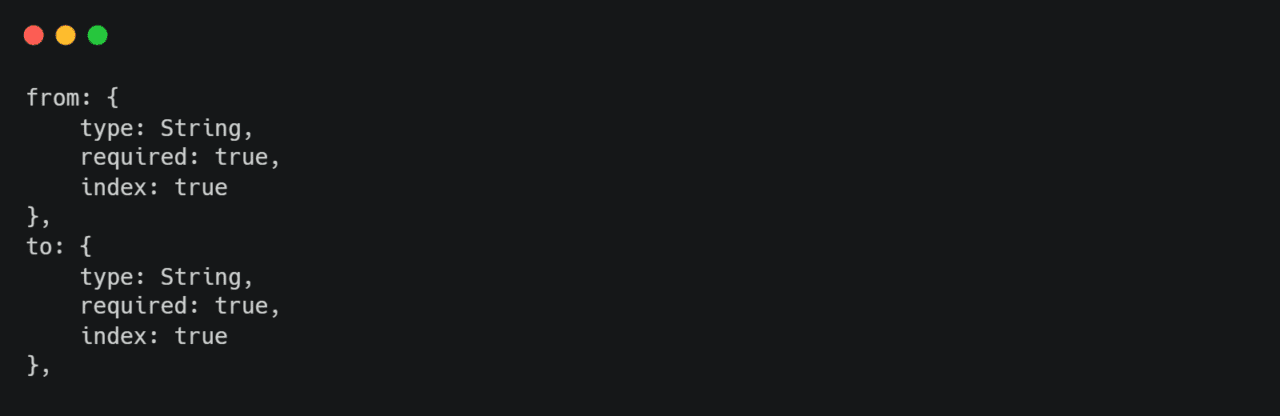
Next, you need to store the addressee and recipient information. These are the from and to fields. Any SMTP provider will require this information to conduct the mail transfer.
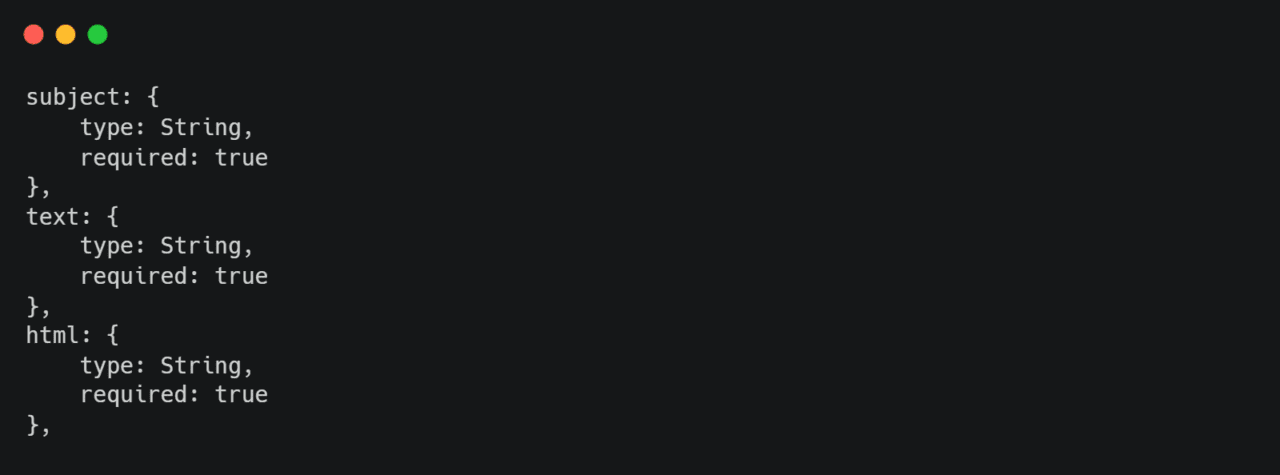
Following, we have the body of the email. The subject, text and html. The text field will contain pure text data, which is displayed when the emailing service is not capable of displaying HTML data.
Then you want to manage attachments. You can have a number of them, so an array is necessary, and to properly store them, both the filename and the path is required.

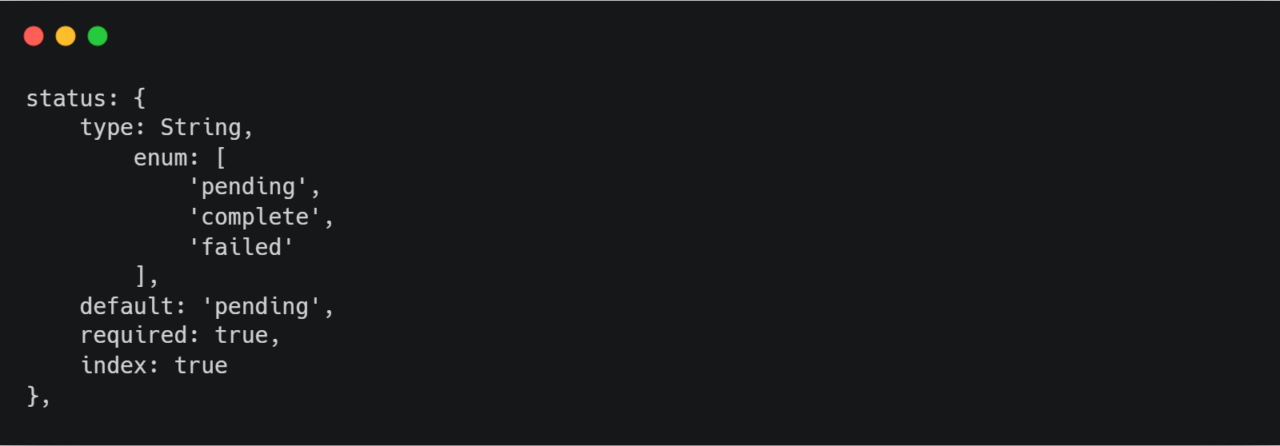
The crucial aspect comes in with the status field. We store all the emails that we want to send, regardless of their status. You will need three status types.
1) Pending – when you have prepared your email for sending, and it is waiting to be processed,
2) Complete – when you successfully sent the email; and finally –
3) Failed – for the case when it fails to send.
This allows you to always be sure that everything goes smoothly. Just for the case when something actually goes wrong, you are maintaining a log of all the emails, so it is super simple to look up failed attempts.
There is a tremendous amount of reasons for why your emails may fail to send. You could dump the error to your logs and scroll through all of them hoping you will find the error, or instead, you could store the error message in your email object. Joining the information about a failed email with an error message, allows you to have a quick access to the direct reason as to why an error occurred.

This concludes the model for your email service. Next, we will look at adding some functionality to your emails so that you can start sending out the emails.
The Hooks
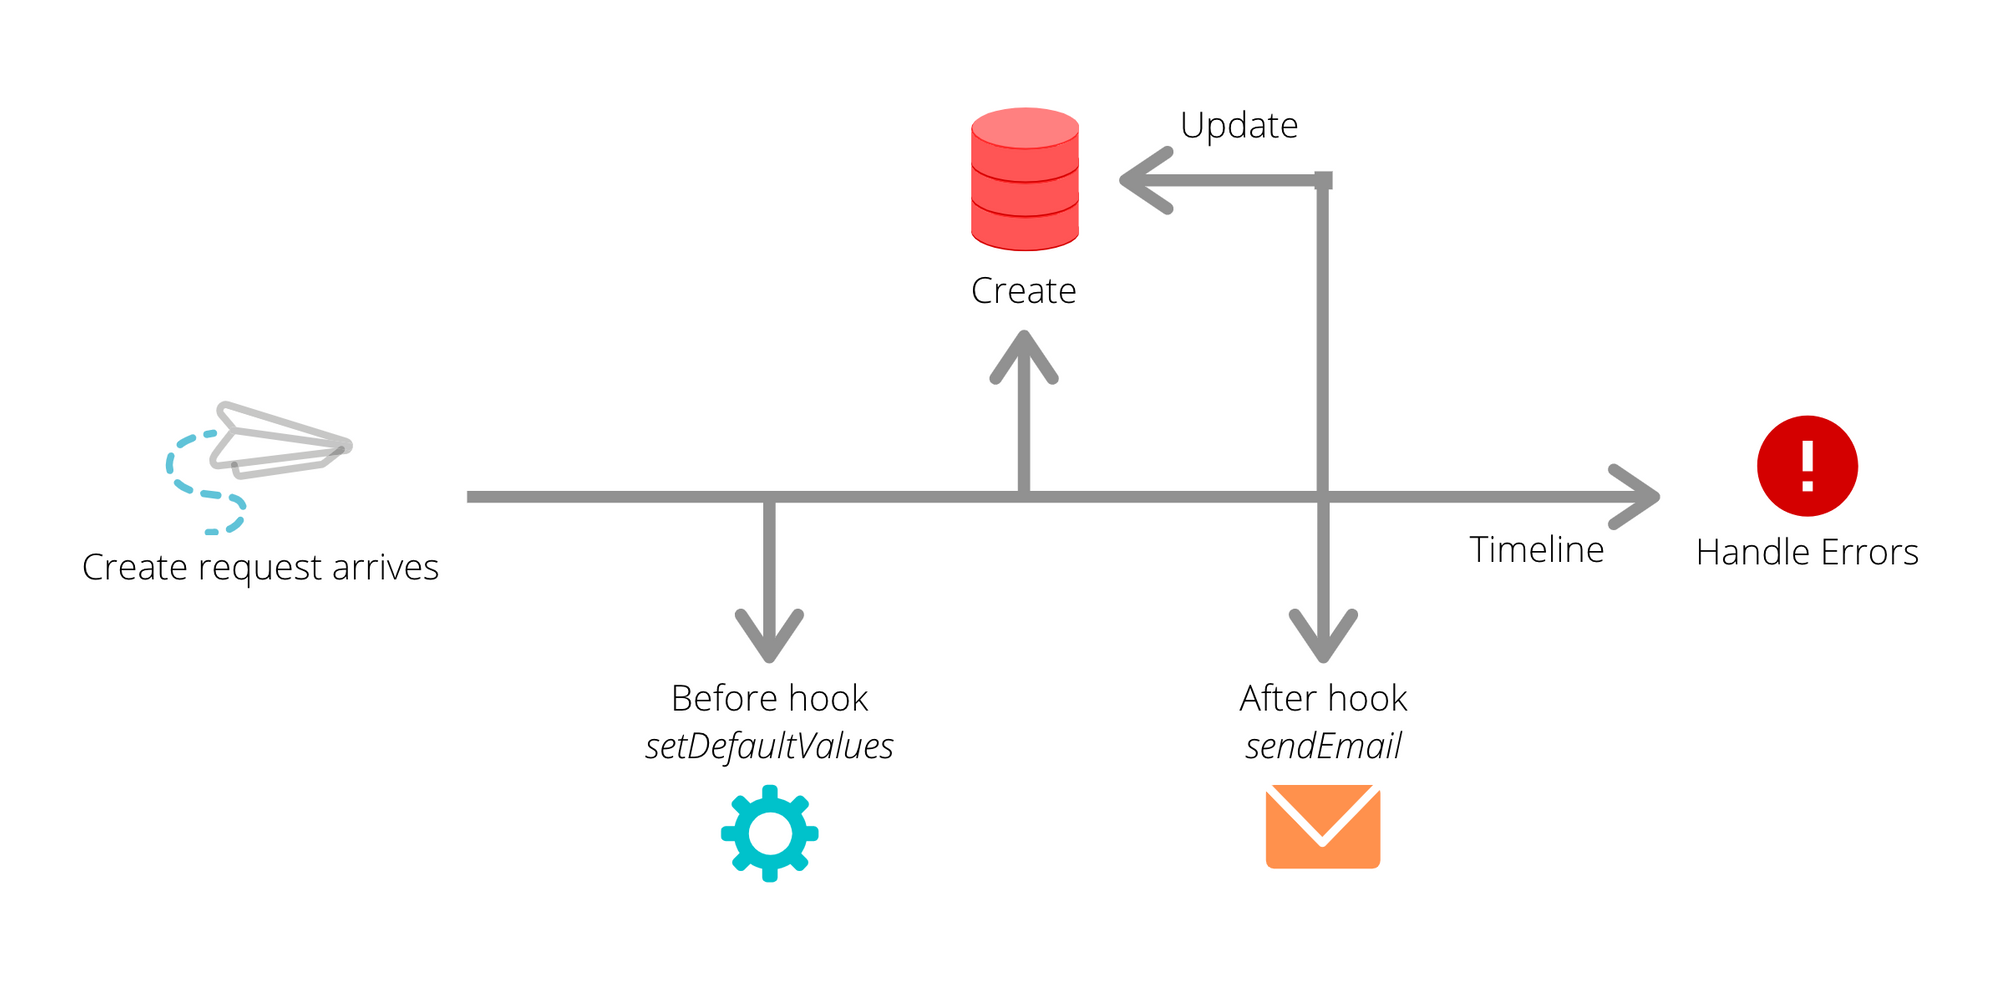
In Feathers.js hooks are the go-to place for adding logic to your services. They consist of 3 main categories: before, after and error. They are defined for all possible CRUD events: find, get, create, update, patch, remove and all.
Before Hooks

We will first have a look at the hooks we attach before we do something with the service. Before you create an email, you want to ensure the default values are set correctly. We handle this by using the setDefaultValues() function.
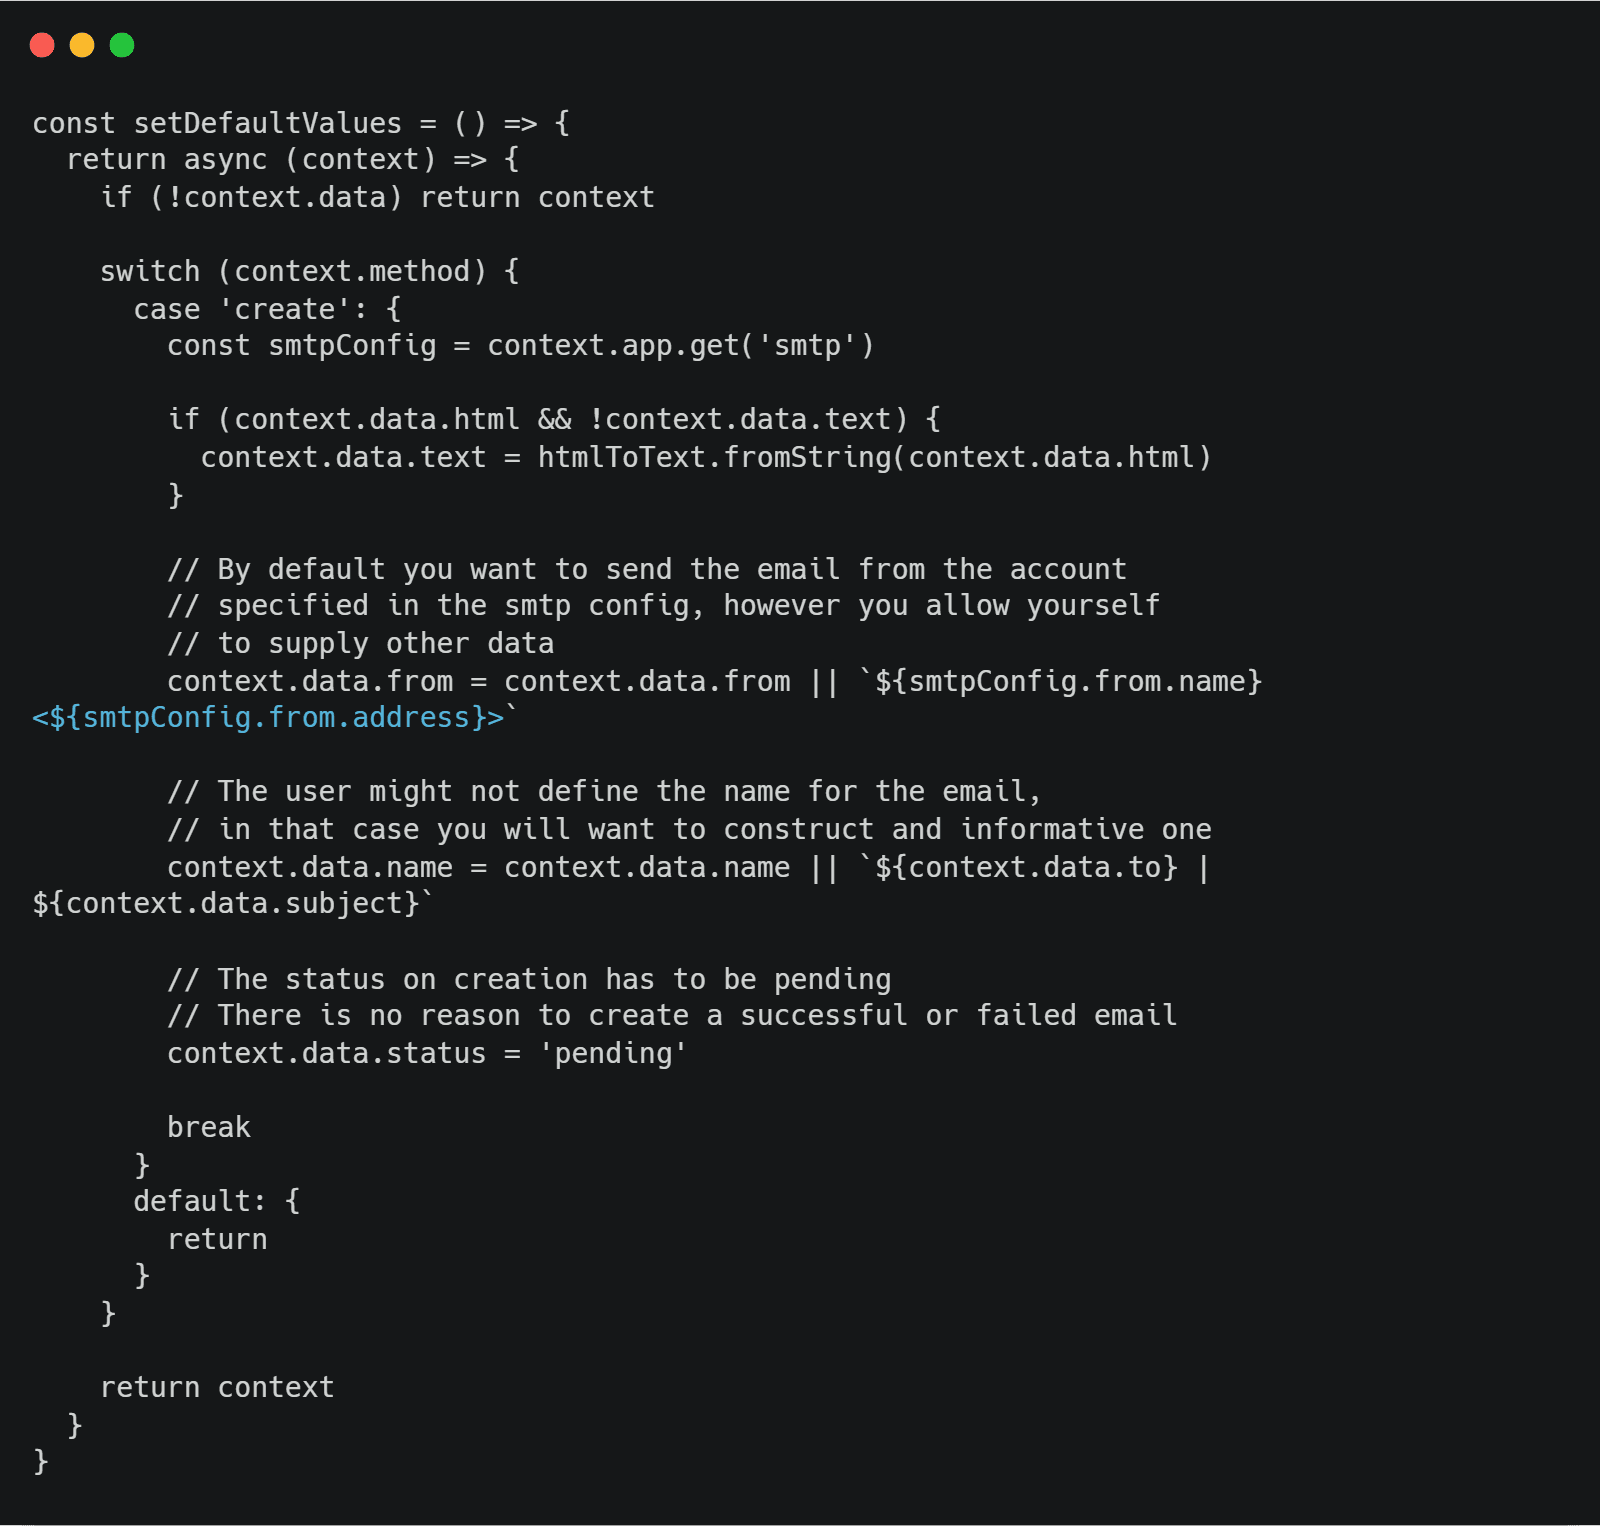
Let’s break it down. Firstly, you want to ensure that the created request contains data; otherwise, it is not valid.

Then the switch double-checks whether this is used for the create method, by checking whether `context.method === ‘create’`. Then you will want to extract your SMTP config object. We store it in the app’s context, which we suggest you should do as well. However, let’s suppose that you are using some other method of storing the information. In that case, you will need to extract the from.name and from.address.

Then, unless your user provides an explicit value for the text field, you will need to parse the provided html to plain-text. For this, we use the html-to-text package.

Next, you check whether the request provides you with the from data. In the case that it doesn’t, you want to use the data about the account you specified in the SMTP config.

The user might not provide you with a name for the email; in that case, you want to generate the name automatically. Then we construct it from the recipient and the subject of the email.

Finally, you need to ensure that the email is created with the pending status. Regardless of what the user sends you, always set the status to pending. There is no reason to construct emails which are by default completed or failed.

After Hooks
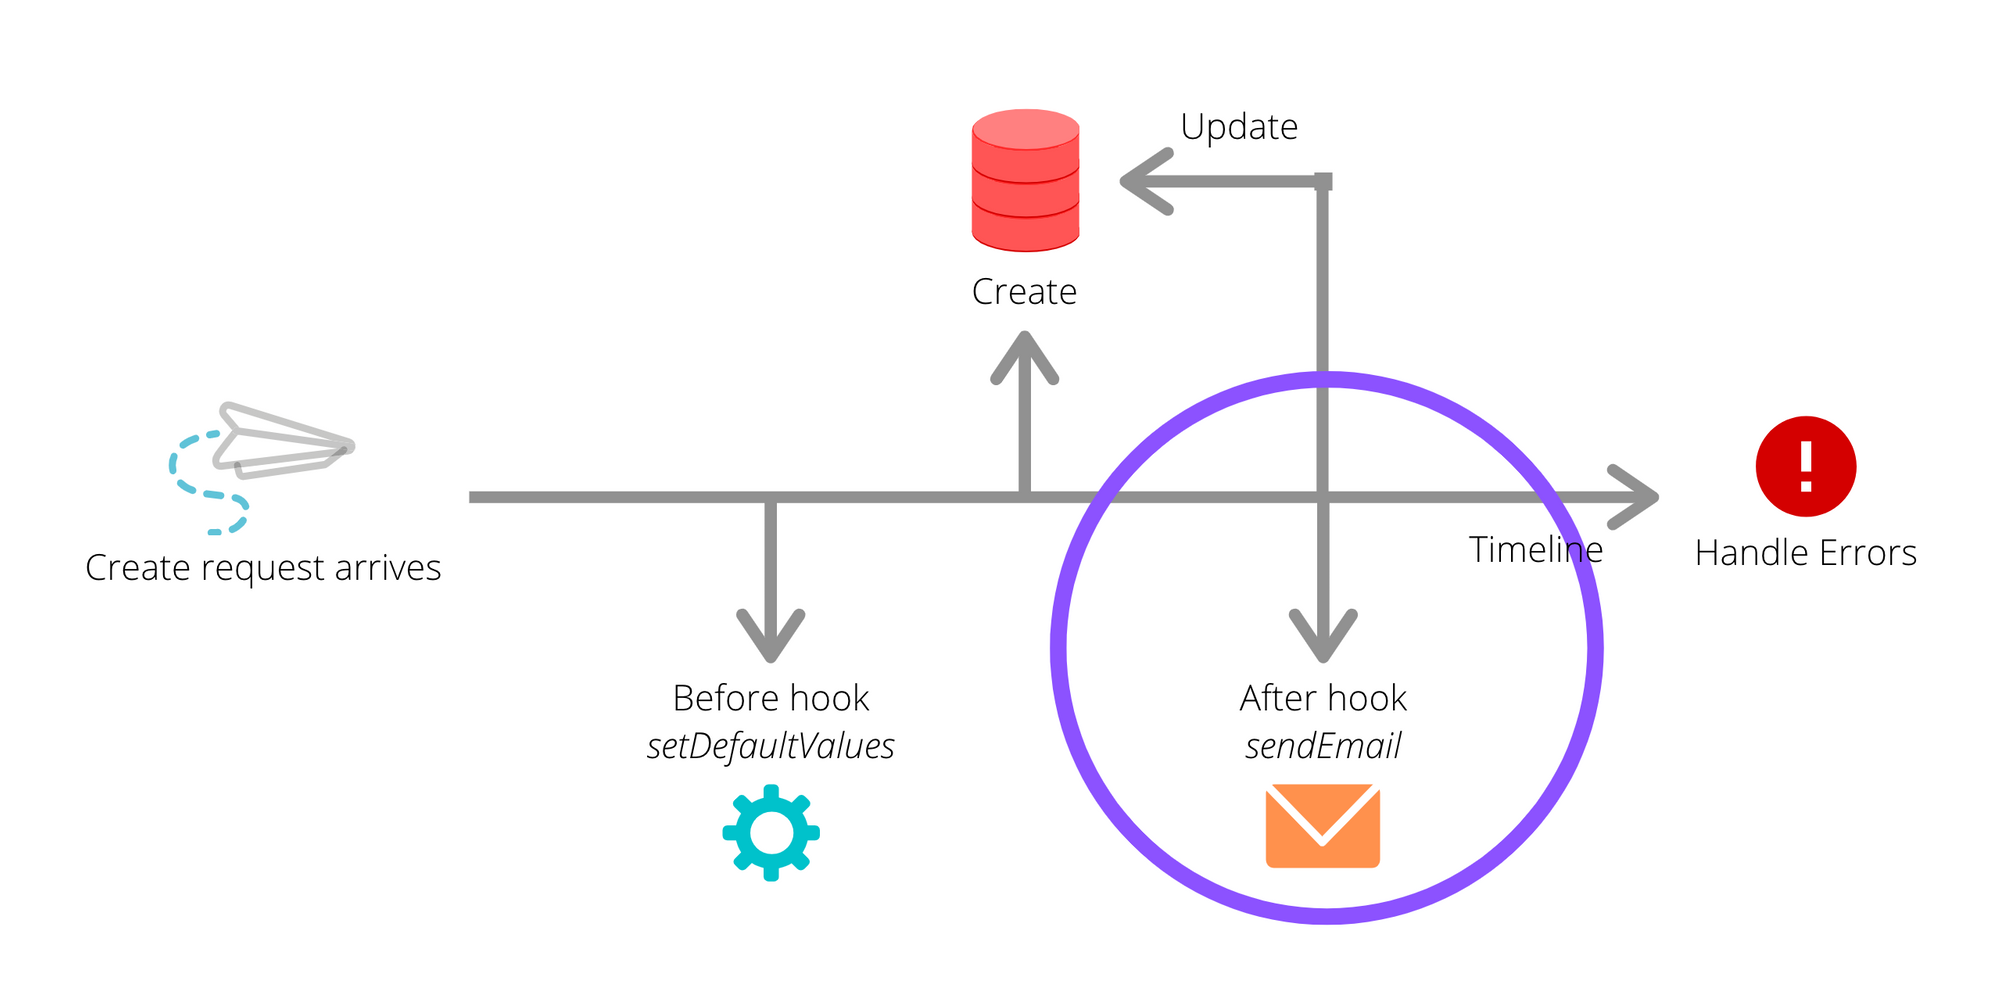
Having all of the data prepared on the before hooks, we can now move on to the after hooks. Here only one hook will be in use – the create hook. The logic is that you will send the email after the email object was created in your database. The sendEmail function manages this.
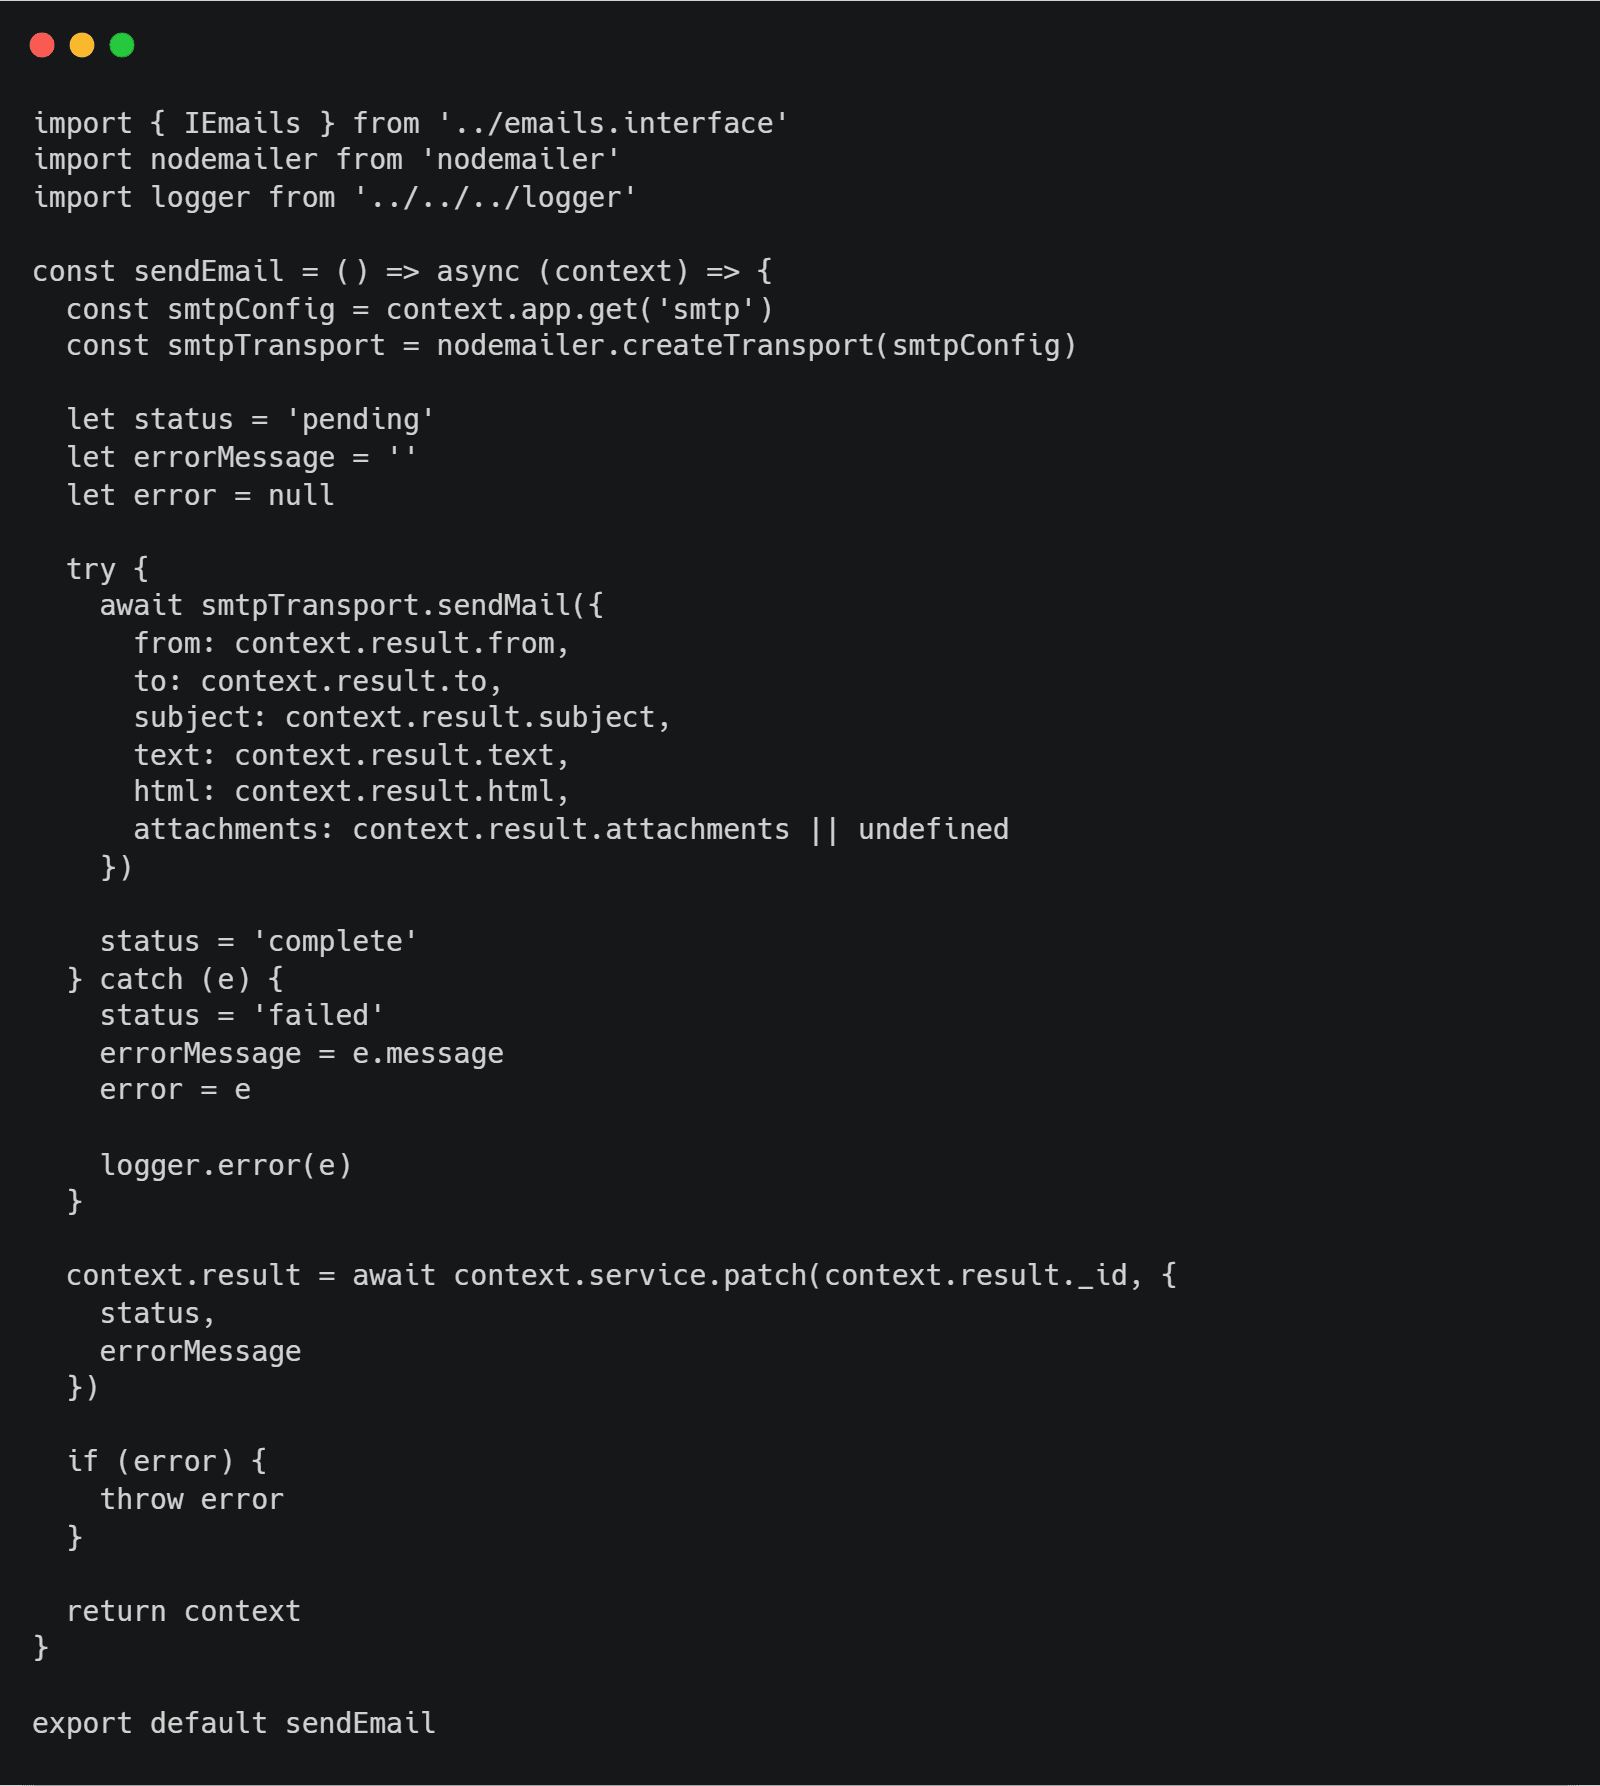
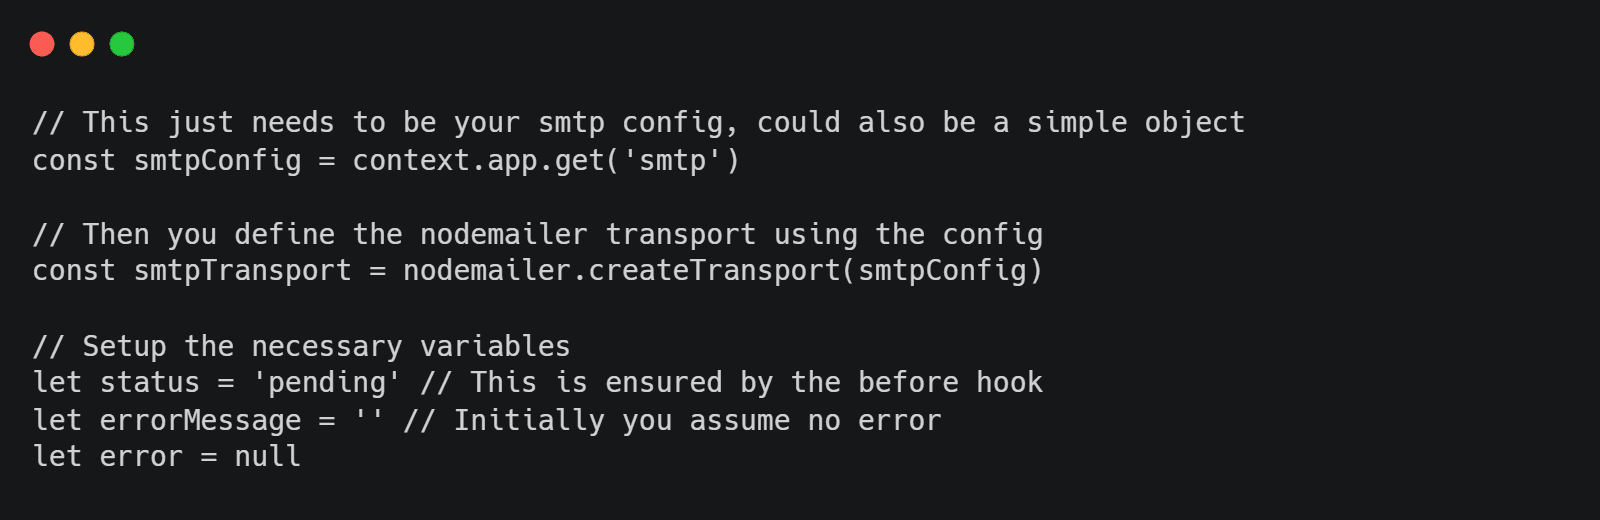
Let’s break this function down a bit. First, we define all of our variables.
Having these variables, we can attempt to send the email. The attempt aspect is essential; there are multiple ways in which an email can fail to send, so you must ensure that you capture any possible errors.
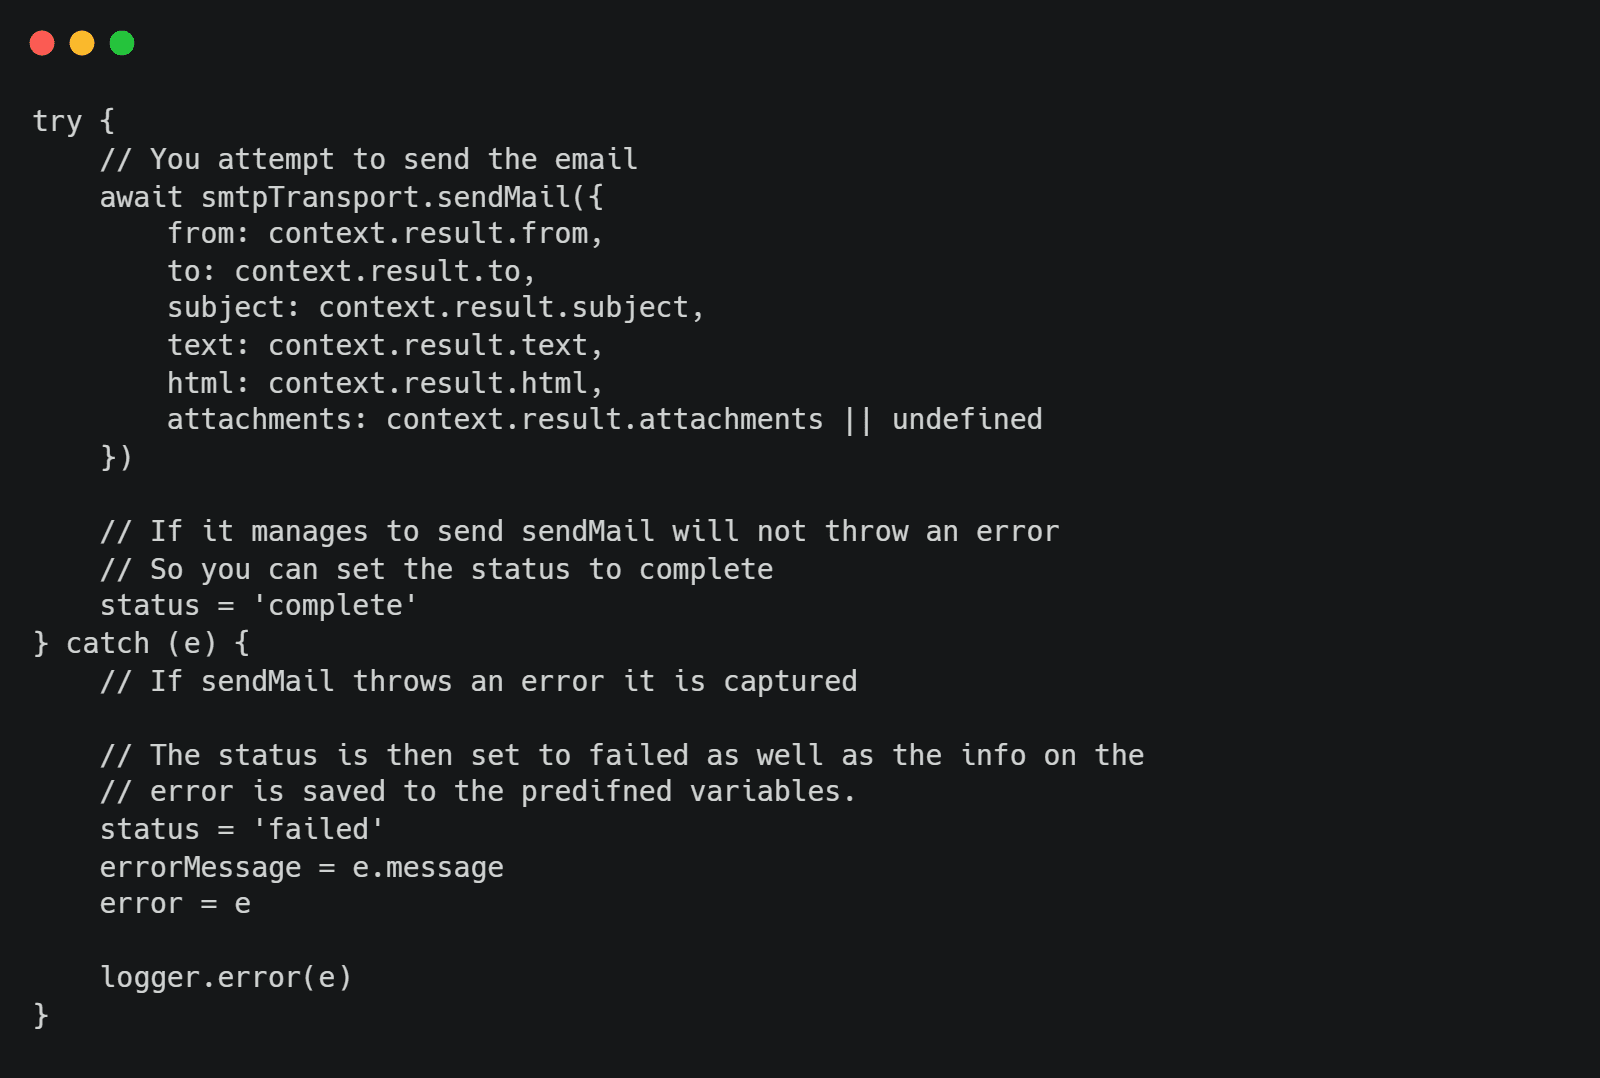
Finally, all you are left with is to save the result to your database. You may also want to throw the error at the end if you also have some other method of managing errors in Feathers.

This concludes the topic of sending emails in Feathers.js. You should now know how to structure your data for sending emails, preprocess all the information and send such an email. Finally, you also now know how to manage errors, which might occur on the way. Good luck 🙂